

I had always intended to look at these two buildings but on the first weekend the family was away I took a trip to Nottingham to visiting Gav. While there we were chatting about building a labrinth of Tzeentch for AOS and on the spur of the moment I ordered some of these.
 |
| Pegasus Hobbies 28mm Scale Small Bricks Grey |
 |
| Pegasus Hobbies 28mm Scale Large Bricks Grey |
 |
| Pegasus Hobbies 28mm Scale Sandbags Loose Unpainted |
The bricks on the other hand are intended for use on these buildings, now the first thing to understand is that they appear to made from clay, and they have a similar texture to the grey modelling clay you can get.
This has a number of issues, firstly the material is fairly soft and can be crushed between your fingers, this means that on it's own your not going to get robust terrain and it should be supported if possible, don't go building walls single brick thick and expect it to live up to prolonged table use, cabinet display will be fine.
the second problem is an extension of the first, the powdery texture means you need to consider how your going to glue these things together, thick glues will simply bond to the outer layer and then come away easily. you need to seal the surface as you assemble your project. Fortunately they are porous so a well watered down PVA will soak in and give an ok bond, constant washes of glue as you build and if using these in conjunction with other more robust materials should give something acceptable for terrain. Just don;t expect to be building more than a few layers at a time as it will take a while to fully dry inside and out meaning your beautiful wall will shift and break as you try to place the next layer.
The ideal solution is to use the really thin super glue, this will soak in nicely and make the bricks themselves much stronger. Expect the bricks to warm up a little and it could well get very messy not to mention they will drink the glue up so cost a lot more.
Since my plan was to use the bricks to make a detail attached to a wall I didn't worry to much and went with the PVA Option. and built this.


Once fully assembled however the building should provide enough structural support so it cant break to easily and if that wasn't enough while building I used wooden guides inside to help with the shifting of complete layers.
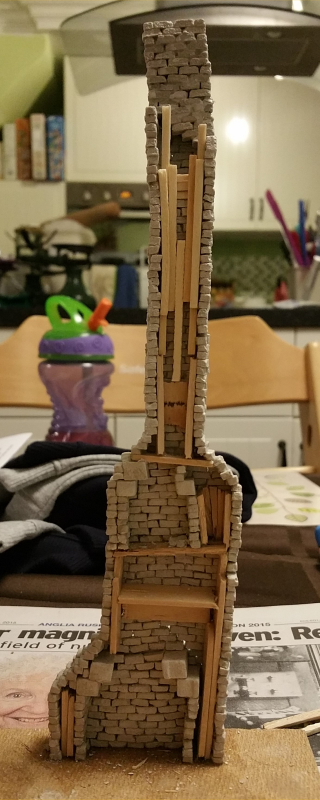
Now you may have noticed in the original Inn picture that I don;t have a base, the Inn is glued in a top down fashion in three layers with each floor's walls glued to that floors ceiling.


Likewise I've begun the same process on the first floor, though less of the wall were built so there is more to do here before it's ready for painting.

Next time round I'll be taking another look at the Knight and Might even fit an extra post in this week for Dread Tober. Until then TTFN
That looks amazing dude, great work, I take my hat off to your imagination (and patience) looking forward to continuing to see it come together ! :)
ReplyDeleteThanks I'll keep posts comming when I have them.
DeleteThere's a bit of a hold on this while I finish Dread Tober. I need to sort flooring out next so looking at options. The I might make some furniture once the walls are done.
OMG - fantastic mate!
ReplyDelete