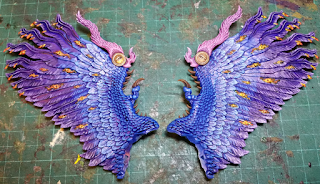
First up was a basic plan, I have an idea for floating Islands which Gavin and I cooked up some time back. Wanting to experiment and have an impressive base it seemed like the perfect time.
I sketched out some rough shapes on the proper base and grabbing a bunch of old square and slotted bases I cobbled together the first parts of a rock. Also notice that the foot print of the lord of change was raised up using little bits of the old bases, this would allow me to use liberal amounts of texture and still have a firm solid foundation to glue the models feet too.
With a basic plan worked out I needed to try out some of the ideas. I'm not a fan of using cork to increase the base thickness and wanted to try out digging into the base. So I cut out a shape to match the rock platform and used chopped up bits of sprue to fix it in place. At the same time using greenstuff and bits of broken up plaster to bulk out the underside of the rock.
All of the work at this point was on the first rock as I wanted to get a proof of concept before doing anything further. Building up greenstuff around the edge of the crater and on the underside of the rock section before gluing it into place. One trick I found* is to role balls of greenstuff and when they are set cut them into two uneven bits to glue down as bubbles.
By making an uneven cut and not perfect halves you can make the 'bubbles' appear from just beginning to form to Just about to burst.
Further research lead me to this Getty image and the splash effect, so I had a go at replicating it as part of the process for hiding the attachment point between the base and the rock. Above the hot lava splash came rough outlines for smoke, these would later be covered in flock to get a good texture.
*Typical that now I want to share this cool trick and the source that I can't find it again.
Once all the greenstuff had set (after a touch more bulking out on the smoke and a few more strands and lumps of splash) it was time to add the textures. Now I did jump ahead with the other two rocks before the textured paint went down and get the holes cut and basic shapes in place but the first rock was finished before the other two where fully glued in place.
Even in all the different colours pre undercoat I could feel that it was going to work and it wasn't long before the second two where well underway and a few skulls added for interest.By this point a deep 2-3mm layer of crackle paint (Agrellan Earth) filled out a chunk on the back of the base. Now the flock used is intended for use as foliage such as the stuff here and feels like finely shredded upholstery foam and is a bit of a faff to get in place.
Before starting I soaked it in watered down (about 50/50) PVA and then brushed undiluted PVA onto the greenstuff. Using tweezers, sculpting tools and a brush the damp flock was carefully applied to the sticky glue and encouraged into the right place and shape.
With the base constructed I added the second brimstone horror, levelled the lava pools with a good dose of 'ard coat and then once fully dry gave it a blast of grey primer before painting begun.
Next time I visit the Lord of Change I'll show off how I painted the base. I also have a post nearly ready to go with the chaos sorcerer and chaos lord for my black legion so I may sneak that in on Thursday.
but until next time TTFN


Comments
Post a Comment